Interactive Actions
Please note: Interactive Actions are currently supported on Xibo for Windows R3 R300 / Xibo for Android R3 R300 and Xibo for webOS v3 R300
Please note: If you are using a v3.1.x CMS, please click here
Actions can be attached to an entire Layout a particular Region or specific Widget and can be used to effect changes to the Layout. These can be triggered by Touch or Click or programmatically by webhook.
Scenario: A Product display has a product that the customer can pick up. An 'internet of things' device, such as a light sensor could be used to trigger a webhook to Sigme which loads that particular products information into a Region to be shown.
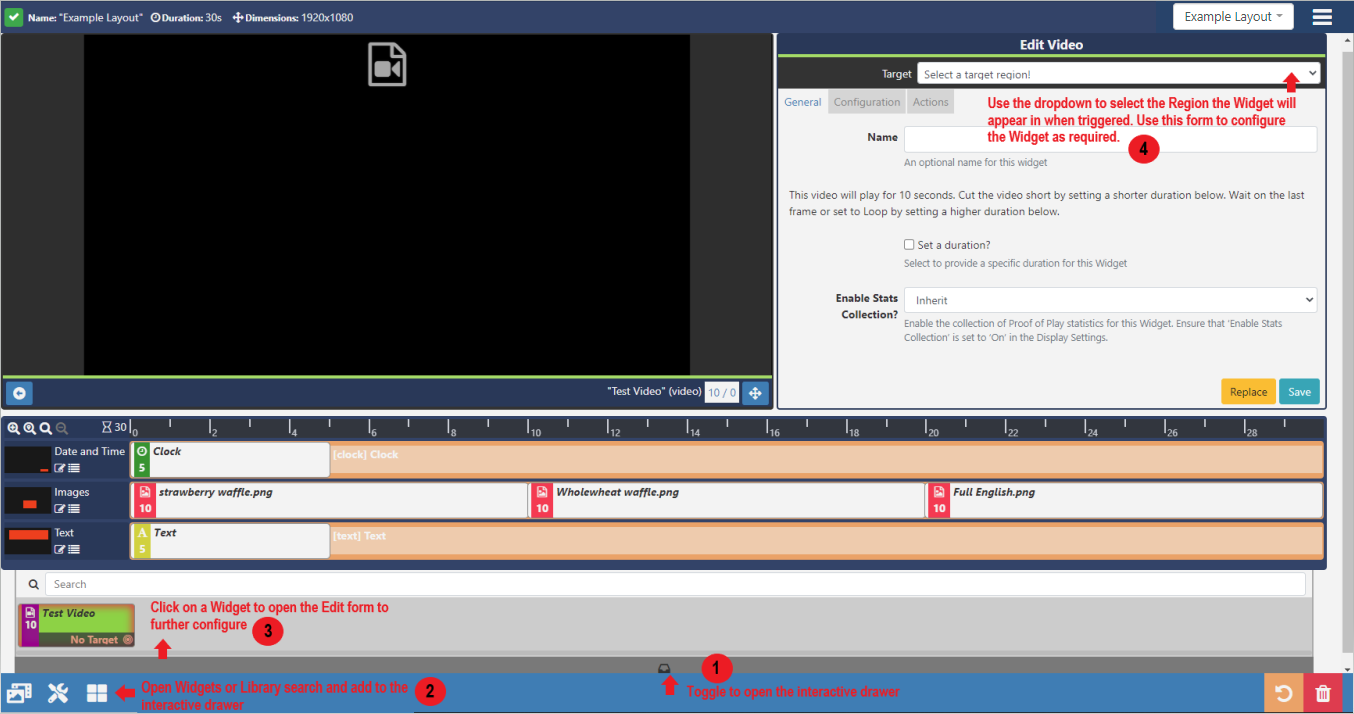
Interactive Actions are accessed from the Layout Designer and created and managed from the Actions tab on a Layout, Region or Widget Edit form.
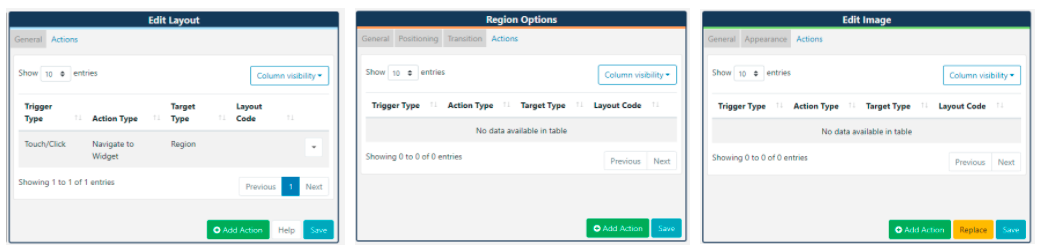
Adding an Action
Actions are created and configured in the Layout Designer using the Actions tab for a Layout, Region and Widget:
-
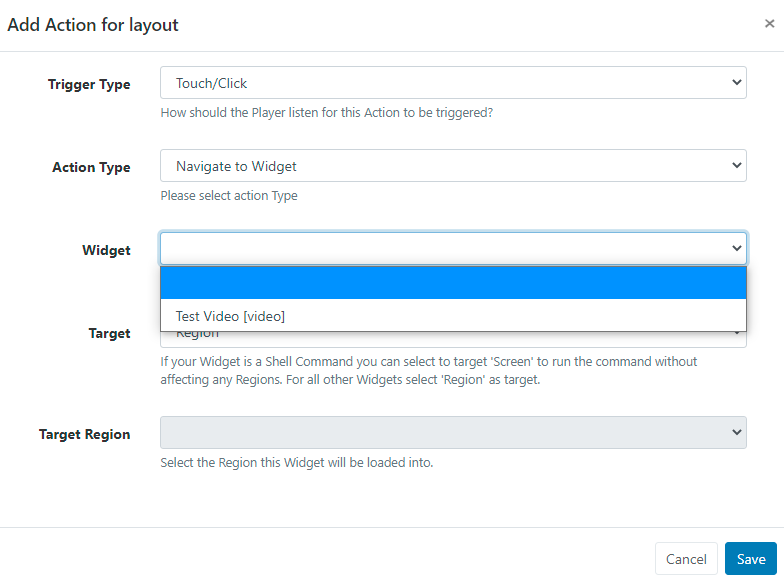
From the selected Actions tab, click on the Add Action button to create a new action.
-
Use the Trigger Type drop down to select how this Action should be triggered:
Touch / Click
Trigger by touching or clicking anywhere on a Layout, a particular Region or a particular Widget
When using Android, ensure that Touch capabilities are enabled for the device from Display Settings using the Advanced tab!
Web hook
Include a Trigger Code, which must be present in the URL
`trigger=parameter.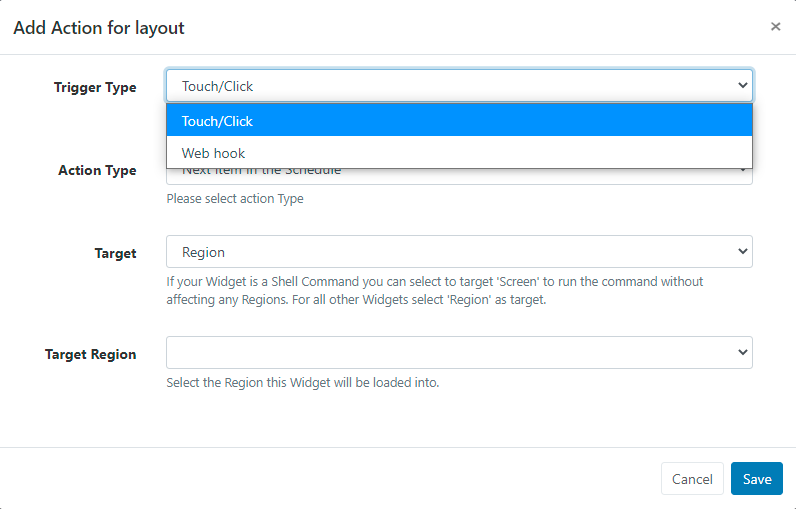
-
Use the Action Type drop down to determine what will happen when triggered:
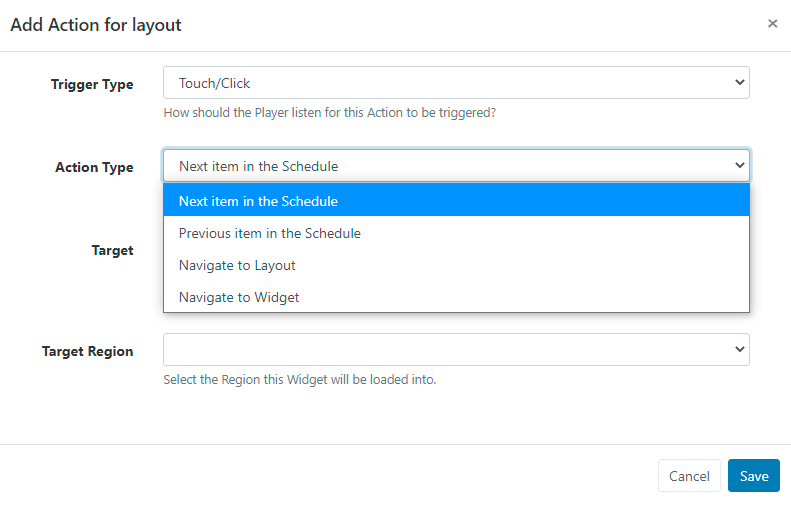
Next / Previous item in the Schedule
This option is available for selection when adding an Action to an entire Layout.
Next / Previous Widget in the Timeline
This option is available for selection when adding an Action to a Region or Widget.
Navigate to Layout
On selecting this option a further field will be presented to select the Layout Code to identify the Layout to be used from the drop down menu.
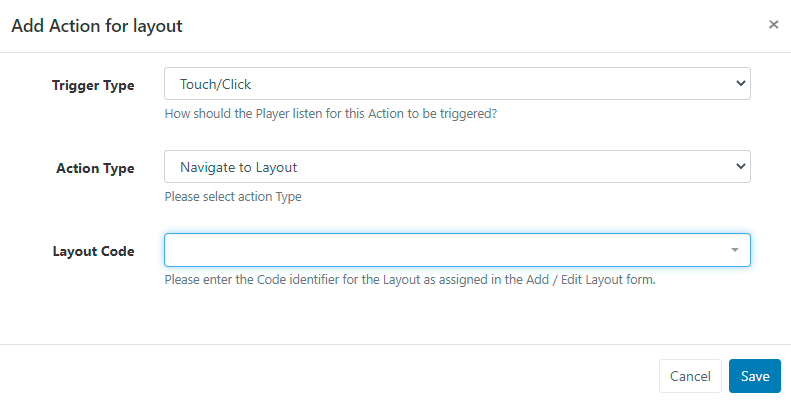
Layouts need to have a Code Identifier assigned in order to be included in this list for selection. Codes can be assigned when adding new or by using the edit form for a Layout!
Navigate to Widget
To use this option, Widgets first need to be added to the Interactive Drawer from the Layout Designer and a Target Region needs to be set.
Ensure you click to Save!
Once added to the drawer, Widgets will show for selection using the drop down menu.
-
Next select the Target:
Screen
This option can only be selected if your Widget is a Shell Command, which will run the command without affecting any Regions.
Region
Select for all other Widgets.
The Target Region set for the Widget in the Interactive Drawer will be shown!
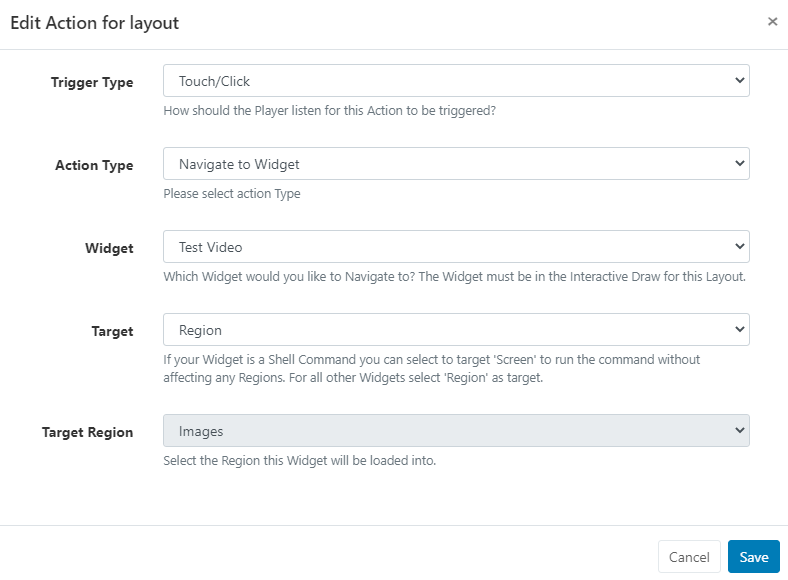
- Once all relevant fields have been completed, click the Save button.
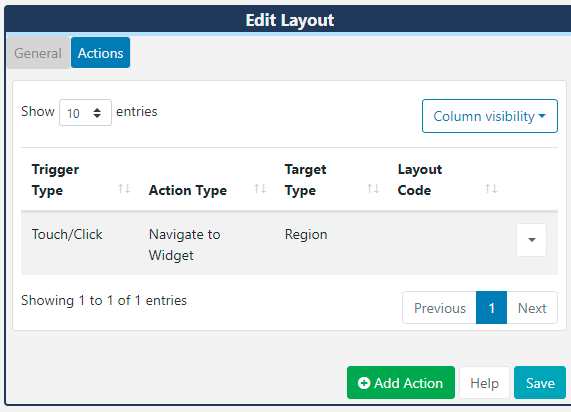
Saved Actions can be further edited or deleted using the Row Menu.